As an Amazon Associate I earn from qualifying purchases.
This post contains affiliate links. Purchases may earn me a commission at no extra cost to you.
Best Value
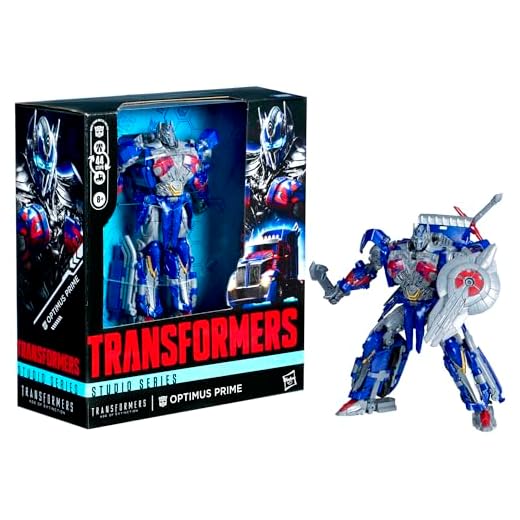
Transformers Studio Series Optimus Prime Figure
Highly detailed movie-inspired design
9.2/10
EXPERT SCORE
Unleash your imagination with this articulated Optimus Prime action figure, designed with stunning details inspired by the movie. Transform between robot and truck mode with ease and relive iconic scenes from the Transformers universe.
How to Use: Transformers Studio Series Leader Class Optimus Prime (Beginner Guide)
Quick Start
- Unbox carefully and keep all plastic bags and small parts away from children.
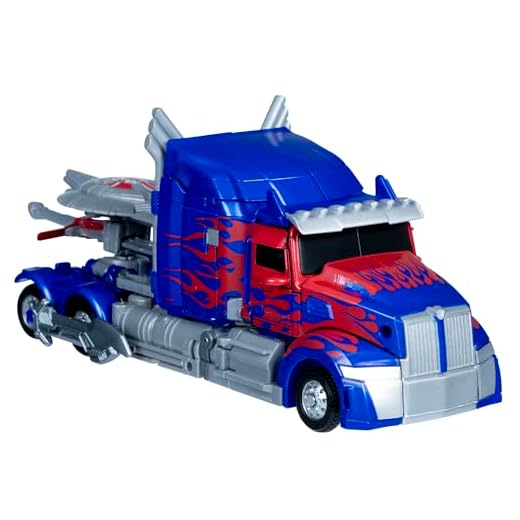
- This Leader Class figure is movie‑inspired and converts between robot and Western Star 4900EX truck mode in 44 steps — go slowly.
- Remove accessories (sword, shield, swappable head) before transforming to avoid damage.
Unboxing
- Place the box on a flat surface and open gently to avoid tearing collector artwork.
- Remove figure and accessories from inner packaging. Keep any instruction sheet (if included) handy.
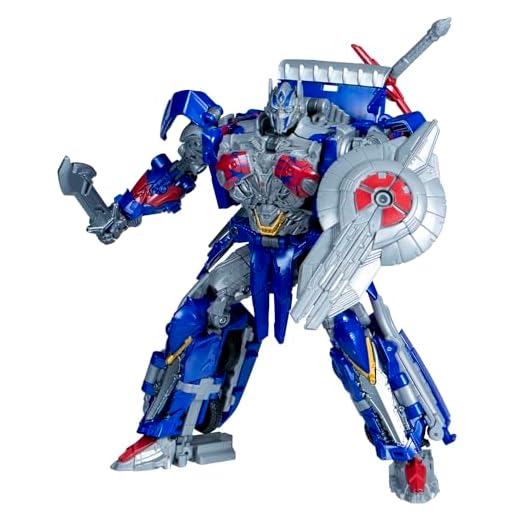
- Inspect parts for obvious damage and make sure all accessories are present: attachable sword, shield and extra head.
Preparing to Transform
- Work on a clean, flat surface with good light so you can see small tabs and pegs.
- Start with the figure in a stable standing pose. Remove any accessories.
- Take your time — Leader Class transforms are multi‑step. Pause if something feels stuck rather than forcing it.
Basic Transform Steps (Robot → Truck) — Beginner Approach
Because this figure converts in 44 specific steps, the list below gives the safe, general sequence beginners should follow. Refer to any included instructions for exact panel order.
- Lower the head and tuck it into the chest cavity if the design requires it.
- Fold the arms inward along the sides of the torso; rotate wrists and forearms so panels line up with cab sides.
- Collapse the legs: fold knees and hips so the legs align under/inside the truck chassis. Often feet tuck into the back of the legs or underside of the cab.
- Bring torso panels forward to form the truck cab, aligning pegs and slots carefully.
- Rotate and snap wheels or side panels into place to create the truck profile.
- Attach any exterior truck panels or bumpers last, ensuring all tabs are fully seated and nothing is pinched.
- Check all seams and make sure moving parts are flush; don’t force any piece that resists alignment.
Truck → Robot (Returning to Robot Mode)
- Remove exterior accessories from their stored truck positions (if applicable).
- Reverse the transform order: open the truck cab panels, extend legs and feet, unfold arms and rotate head back into place.
- Snap panels into robot positions, double‑checking joints and articulation points.
- Reattach the swappable head if you want to change facial deco, pulling straight up to remove and pressing new head on until it clicks gently.
Attaching and Using Accessories
- Sword: Grip in the figure’s hand or slot into a hand peg. Rotate wrist to secure the weapon for dynamic poses.
- Shield: Attach either to the forearm peg or hold with the hand, depending on design. Make sure connection is snug but not forced.
- Swappable head: Remove by pulling straight up (avoid twisting). Line up pegs and press straight down to attach the alternate head.
Posing and Display Tips
- Use the figure’s articulated head, shoulders, elbows, hips and knees to create action poses. Move joints gently and within their normal range.
- Lower the center of gravity (bend the knees slightly) for more stable dynamic poses.
- Display on a flat shelf or use a figure stand for airborne poses. Keep out of direct sunlight to avoid paint fading.
Care, Cleaning and Maintenance
- Clean dust with a soft, dry cloth or a soft brush. Avoid solvents, alcohol or long exposure to water.
- Do not leave the toy in extreme heat or cold — this can warp plastic and affect paint.
- If joints become loose, increase friction with a tiny piece of clear tape around the peg or consult a hobby forum for safe joint‑tightening methods.
- Store small accessories in a labeled bag or the original box to avoid loss.
Troubleshooting
- If a part feels stuck: stop, locate the adjacent panels, and reverse the last step. Gently wiggle — do not force.
- If paint or a panel chips, keep the part and contact retailer/manufacturer for warranty or replacement options.
- For broken pegs or severe damage, contact the manufacturer with the part number (Part Number: G0482) and purchase details.
Safety and Storage
- Keep away from small children — accessories and small parts may be a choking hazard.
- Store in original packaging or a padded box for long‑term preservation. Keep in a cool, dry place.
Product Notes and Specs
- Model / Part Number: G0482
- Leader Class size — movie‑accurate collectible: approximately Leader Class scale (about 8–10 inches tall).
- Includes: Optimus Prime figure, attachable sword, shield, swappable head.
- Collector note: This figure converts between robot and Western Star 4900EX truck mode in 44 steps — take your time and enjoy building the transformation sequence.
Enjoy displaying and transforming your Studio Series Optimus Prime — take it slow, keep accessories safe, and it will be a standout in your collection.